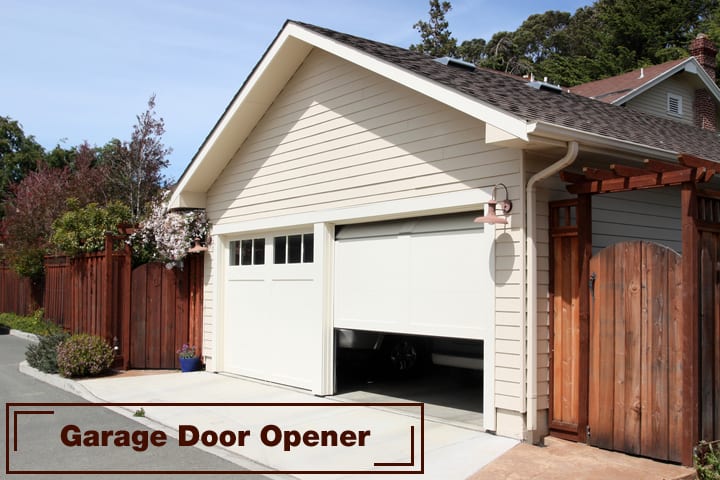
An automatic garage door opener is a wonderful, energy and back saving tool. At the click of a button, your door opens and you can drive your car in or out of the garage. If you are using the garage as a workshop, you can open the door just a little for ventilation.
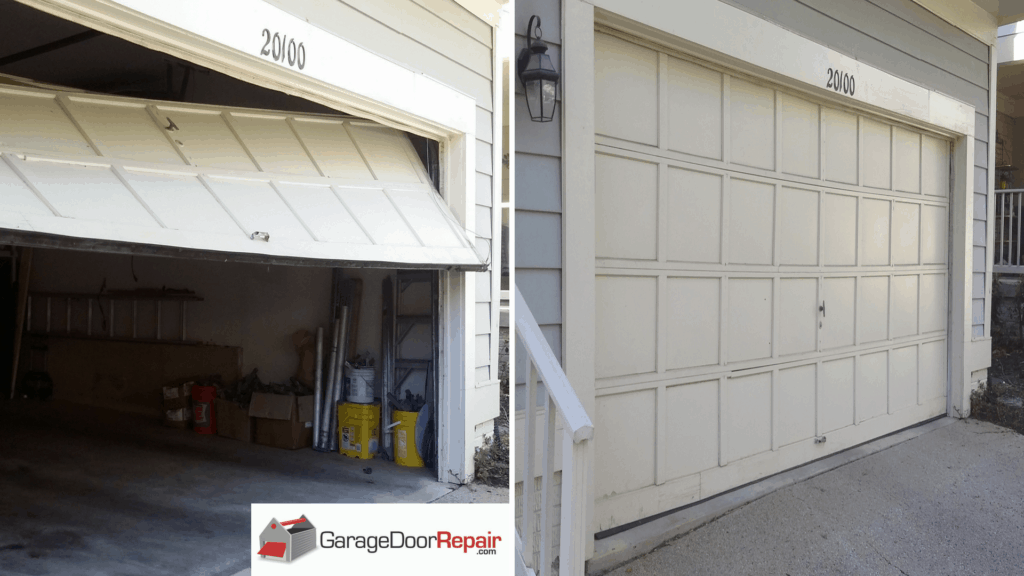
There may be times that you want to disengage the automatic opener and use the garage door manually. This may be due to a power outage or just wanting to open the door a few inches and no more. Resetting the door is something that can be confusing. By following these steps, you can reset your garage door quickly and without fuss.
To manually open most garage doors, you simply pull a corded handle that is attached to the door. This disengages the electric drive from the door and you can manually open and close it. To reset it, begin by pulling the cord in the opposite direction. It should click in place. Once this happens, you can open and close the door electronically.
Step 1: Ensure the Door is in The Down Position
It’s important to be careful when disconnecting your garage door opener from your door. Make sure the door is in the closed position. If it’s not, and the spring is broken, the door could come crashing down and cause damage or harm.
If you experience a lose of power while your door is in the up position, please call your local Overhead Door Company.
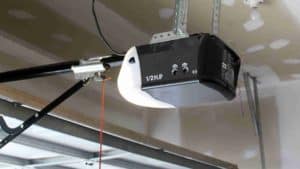
Step 2: Pull the Emergency Release Cord
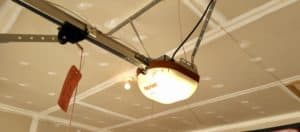
The emergency release cord is a lifesaver in your garage. It’s that red rope hanging from the door trolley that helps you take control of your garage door when you need it. The door trolley is attached to the door and moves with it as it opens and closes, but it’s also connected to an automated mechanism that moves the door along the door rail. If you ever need to, the emergency release cord lets you manually open and close your garage door by disconnecting the trolley from the automated mechanism. So, next time you’re stuck with a garage door that won’t budge, remember your trusty emergency release cord!
Step 3: Manually Move the Door Up and Down
By pulling the emergency release cord you now have the ability to move the door freely. You can effortlessly open and close your garage door as many times as you want. Just remember, once you’re done playing around, put the door back down before turning on the automatic opener again.
Step 4: Pull the Emergency Release Cord Towards the Door
The spring lever, has two positions – connected and disconnected. When you need to access your garage manually, simply pull the emergency release cord down and away from the door towards the motor. This will extend the spring lever, allowing you to take control. When you’re ready to re-engage the opener, simply pull the release cord down towards the door and away from the motor, compressing the spring lever and putting the power back in the hands of your trusty garage door opener
Step 5: Reconnect the Trolley to the Opener
You have two options to get your trolley back on track and reconnect it to the opener carriage. You can either do it the old-fashioned way by manually sliding the door along the track, or you can hit the magic button on your remote and let technology do the work for you. Either way, you’ll hear a satisfying click as the attachment point locks back into place. And once it’s all set, your emergency release cord will be ready and waiting if you ever need to move your garage door manually.
Conclusion
Resetting your garage door opener can be a breeze with these 5 simple steps. Firstly, make sure your door is in the closed position. Then, pull the emergency release cord to disengage the electric drive from the door and move it manually. Next, move the door up and down. To re-engage the opener, pull the emergency release cord towards the door and either manually slide the door along the track or hit the button on your remote. You’ll hear a click as the attachment point locks back into place, and your emergency release cord will be ready for use in case you need to manually open the door again.
If you find yourself still being unable to reset your garage door after following these steps, please reach out to your local Overhead Door company immediately.
How to Know When It’s Time to Repair or Replace Your Garage Door
Out with the old, in with the new! That’s one way to look at things, but while familiar sayings may ring true, there’s usually more to decision making than that. The important thing to remember is that any time you have to make a choice there are several things to consider, things unique to you and your set of circumstances. Evaluating your wants, needs, and desires, tempered with practical considerations, can help you get the best results. Your garage door is damaged. Sure, you want the door to work properly. You need to be able to live and work as you did before. And like most people you desire the best, newest, safest, quietest garage door available. There are several ways to approach this.
Signs You May Need a Replacement
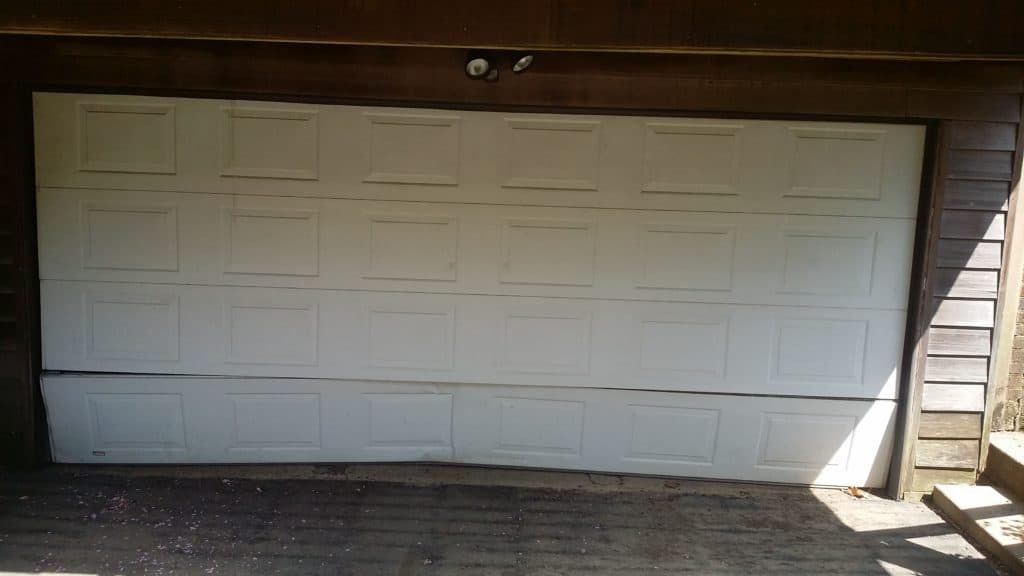
Example #1: Car versus door leaves you with a dented section.
Some considerations:
- Proper, safe, section replacement by homeowners is usually not practical. In many cases a section replacement may be half the price of a new door.
Get a new door. This gives you a chance to have the latest features, perhaps better insulation, new color choices, better weatherstrip, maybe a row of windows. You’ll have a new warranty too. - What if you have two doors on your garage and the new product won’t match the old? As well, a replacement section may not look exactly the same as the rest of the door due to the natural fading which, depending on the age and location of the door could be very noticeable.
- If the door has had a lot of use, wear parts like rollers and cables may cause trouble and expense in the future.
- Have you had a number of service calls in the past? Springs have a limited life and can fail after a specified number of cycles–maybe not long after you replace the damaged section.
- How old is the door? How old are you? (Sounds funny, but consider this for all major purchases.)
- Do you plan to stay in the house?
- What was the condition of the door before it was hit? Have you already had a service call because of the accident?
Signs You May Only Need a Repair
Example #2: The door does not work properly.
Some considerations:
- Inspect the door, inside and out, for obvious defects like broken cables or springs.
- While the door is in the down position, disconnect it from the operator, if applicable. Open the door. If it is heavy, or noisy, return it to the closed position and lock it in place. Have your Garage Door Repair technician check the door.
- If there are major problems, the same principles shown above apply: How old is it, overall condition, how often it’s used, your plans to stay in the house, etc. In many cases a simple repair is the best way to go.
- The door may not be connected to the operator drawbar arm.
Example #3: Your operator is not working.
Some considerations:
- There may be loss of power to the unit.
- Photo eyes may be dirty or out of alignment. Note: that service technicians will not repair any operator that does not have external safety devices, such as photo eyes, making total operator replacement the only option available to the homeowner.
- There could be an obstruction in the opening.
- The problem may be with the door, not the operator.
- The low voltage wiring to the wall button may be loose or broken.
- Transmitter batteries may be weak. Light bulb replacement is an easy task.
- With an operator, the age of the unit is a major consideration since there is ongoing improvement in the technology available that gives owners more convenience and security than ever before. Unless there is a very simple fix, operator replacement and the benefits to the homeowner make this an easy choice.
Let Us Help
Decision time. Ask yourself what’ll you have when the job is finished. In summary, because of the tools and techniques needed there’s little a homeowner can safely do to fix a door problem, so whether to fix an existing door/operator, or installing new equipment is a question of value. Calculate this by looking at the facts, list the pros and cons and see what will be the best choice for you. Often one of these–the pros or cons–will far outnumber the other.
At GarageDoorRepair.com, we connect you with local garage door repair experts from around the country. Find a locally licensed company with highly-trained technicians who can provide garage door repair replacement services in both commercial and residential settings.
Considering DIY Garage Door Repair?
Here are a few reasons you might want to reconsider…
A sign in a Pennsylvania bicycle repair shop reads:
LABOR RATE
$ 50.00 per hour
$ 75.00 if you watch
$ 100.00 if you help
$ 200.00 if you worked on it first
There’s a lesson here and it is that the bicycle repairman has learned from years of experience that some things are more complicated than they look, more dangerous, and in the long run, more expensive. DIY attempts to perform door work might well carry the familiar warning ‘don’t try this at home’.
Of course homeowners can and should inspect their doors, apply lubrication, and look for obvious signs of wear. This includes things like listening to doors and operators in motion, or checking to see if the perimeter weatherstripping is doing the job, all the while using common sense as you would with any large moving object.
List of safe DIY Garage Door Inspections
- Park your vehicles outside, close the door and see if it moves smoothly.
- Disconnect the door from the operator and move it by hand. Does it stay closed? Does it drift down from the open position?
- Look to see if it sits level on the garage floor.
- Does it clear the header when in the fully open position?
- Check to see if the photo eyes are clean and properly aligned.
- Inspect the sections inside and out; worn or damaged sections can mean that the door no longer provides security for the home, and could cause property damage and serious bodily injury.
- Is the operator plugged in correctly?
- Make sure the track is fastened securely to the jambs, look for frayed cables, broken springs, worn rollers, and loose fasteners.
Be mindful of the fact that to the untrained eye it’s easy to miss something that is worn, loose, or broken.
Doing these things should be a regular part of household maintenance. If you are handy around the house go ahead and snug up a loose fastener, tap that nail that holds the weatherstrip to the jamb, clean and lube the door as necessary. When a serious problem arises, however, it’s best to turn to an expert for help.
3 Serious Reasons to reconsider DIY Garage Door Repair
- Tools. An experienced garage door repairman will have the proper ladders, specialized tools, and the correct parts needed to fix most problems. He will also have things the homeowner won’t have and can’t buy at a big box store: cold rolled steel winding bars of various sizes, aircraft cable, special cable pulleys, operator parts, spring stock and gauges, torches and much more. Hammers, screwdrivers and pliers are good for small jobs around the house, but of little use, and can cause injury, when performing proper garage door repairs.
- Training. Another consideration is that with overhead garage doors things must be done in the proper order. What’s the first step to take to adjust, replace, or wind a spring? Are repairs made with the door in the open or closed position? How would you attach a new cable to a spring, drum, or bottom fixture? If you attempted to do the work yourself, how would you test it to see if it was okay? Tested it safely, that is. The garage door spring is among the most dangerous repairs and can result in serious injury, or even death, if not done correctly.
- Ladders. It sounds simple, however, each year thousands of people are injured or killed in home-related accidents. And, almost without exception, the number one leading cause is always falls. The Home Safety Council says falls account for roughly 6,000 deaths annually. While you’re always susceptible to a fall, you should do everything you possibly can to avoid situations where falls are particularly dangerous. This includes climbing ladders to fix garage door issues.
The old definition of an expert was someone who came from more than 50 miles away and was carrying a briefcase. Mark Twain joked that an expert was just a regular fellow from the next town over. Our factory trained technicians are close at hand, have a truck full of parts and specialized equipment and have something else in their tool kits – Safety. In most trades, a pinch, a cut, and a bump on the head are all common on-the-job injuries, and as a result workers quickly learn from experience how to do things the right way, the safe way. In our business training and experience are top priorities.
Safety is a serious concern at all large major companies. Some multi-national corporations go so far as to cease production at every facility they own if there is an accident with injury anywhere in their system. Full reports and appropriate instructions are sent to all parties at every location and orders are issued before operations are resumed. That’s serious. Being safe is a priority for them and good word of advice for a homeowner.
If you decide to do the work yourself remember that you can fall, and things can fall on you. As well, DIYers working on a garage door can and do sustain cuts, bruises, broken bones, eye injuries, even electrical shocks, all as result of not having the right tools, parts, and experience.
Above all else, safety is the key factor in making the decision to use a professional.
Be safe, DDIY. Contact Your Local Garage Door Expert Today.
As the largest moving piece in your home, the garage door should command a lot of respect and attention. Unfortunately, many homeowners don’t understand that garage door openers don’t last forever and never consider the possibility of replacement. If you own a garage door opener that’s more than 15 or 20 years old – and especially a pre-1993 version – then you’ll be interested in learning more about the benefits a replacement can provide.
It’s Time to Replace, When…
The average garage door opens and shuts roughly 1,500 times per year. And while everything might seem fine one day, it’s possible that it’ll give way the next. That’s just the nature of garage door openers. Sometimes they’ll give you a warning sign, while other times they simply decide to stop functioning.
There are things you can do to ensure your garage door opener enjoys a long, safe life, but there are also a number of factors out of your control. However, one of your key responsibilities as a homeowner is to remain aware of what your garage door opener is telling you. Keep an eye (or ear) out so that you know when the time is right. Specifically, here are 5 reasons to replace your garage door opener.
1. 1993 CPSC Rule
In an effort to reduce the number of deaths and injuries to children and pets who became entrapped underneath garage doors with automatic openers, the U.S. Consumer Product Safety Commission (CPSC) established a new set of rules in 1993 for automatic residential garage door openers.
The rule was enacted as part of the Consumer Product Safety Improvement Act of 1990 and required that any automatic garage door openers manufactured on or after January 1, 1991 conform to the various entrapment protection requirements laid out in the legislation.
The 1993 CPSC rule contains a lot of information, but the basic gist is any garage door manufactured after the ruling is required to have a safety reversing mechanism. This feature uses two sensors on either side of the door. If at any time during the closing of the door an object, child, or pet interferes with the beam running between the two sensors, the door immediately stops and reverses.
If you have a garage door opener that was manufactured and installed prior to this ruling, then it’s time to replace it with a new one. You’ll need an opener that’s equipped with a safety reversing mechanism.
Even if you have a post-1993 unit, it’s important that you regularly check the safety reversing mechanism to ensure it’s working properly. You can do this in three simple steps:
- Look to the bottom of each side of the garage door and verify that the sensors are mounted no higher than six inches off the ground. Any higher and the sensors won’t be able to recognize objects in the garage door’s path.
- Use an object to the block one of the sensors and then press the garage door opener button. The door should not close while you’re blocking the sensor.
- Lay an object that’s 1.5 inches or higher on the ground (in the door’s path) and again press the close button. The door should begin to close and then reverse direction.
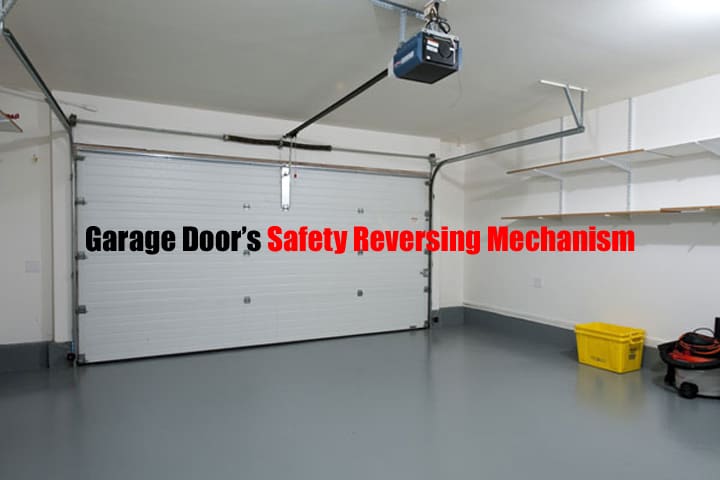
Most people aren’t aware of how important their garage door’s safety reversing mechanism (or lack thereof) is. Keep these tips in mind and check to ensure you’re compliant..
2. Noise Issues
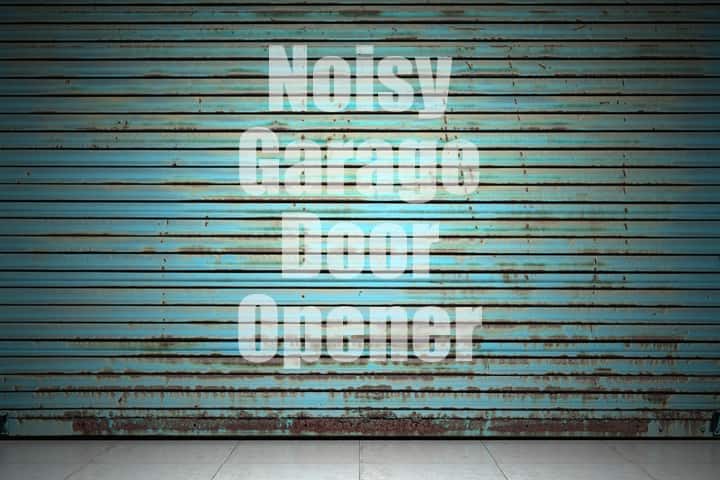
Every neighborhood or street has that home with the noisy garage door opener. Don’t be that neighbor. Not only is it embarrassing, but it can be a nuisance for everyone. If your garage door opener has been noisy for years, you probably don’t even notice. Take this opportunity to check the noise level of your opener. Is it on par with the neighbors’ garage doors, or does it seem unusually loud?
Older garage door opener models were built with large, noisy components, while newer models use much quieter chains or belt drives. The latter is virtually silent when compared to an old chain unit. You’ll be amazed at the difference.
3. Home Security
Older garage door opener models were very low on security features. They had fixed codes that could be stolen using radio frequency identifier devices, which made them a popular entryway into the home for burglars.
On the other hand, modern models use advanced technological features with rolling codes. This means the code changes each time the door is operated. As a result, the code cannot be stolen. This prevents break-ins and enhances security. If you’re still using an older model, then it’s important that you review its security features to know whether your home is fully protected.
4. Battery Backup
Few things are more frustrating than having your car locked in the garage during a power outage. While older models have latches that can be pulled to manually open the door, these mechanisms often get stuck over the years and can be difficult for some individuals to operate.
New models have battery back up features, which are extremely useful during power outages. Your garage door can open and close for many cycles using this battery. While you may only need to use it once a year, it provides peace of mind.
5. No Outside Keypad
Older garage door opener models had manual operation. If you wanted to open the door from the outside (without the remote opener in your vehicle), you’d have to use a key. Newer models feature keypads on the outside of the garage door, which require a simple programmable code for entry. This lets you to give access to people, even when you aren’t home.
Contact a Local Expert Today
It’s easy to take your garage door opener for granted; however, it’s imperative that you give it the attention it deserves. If you have any of these five issues, then it’s time to consider replacing your outdated model with a newer and more functional solution.
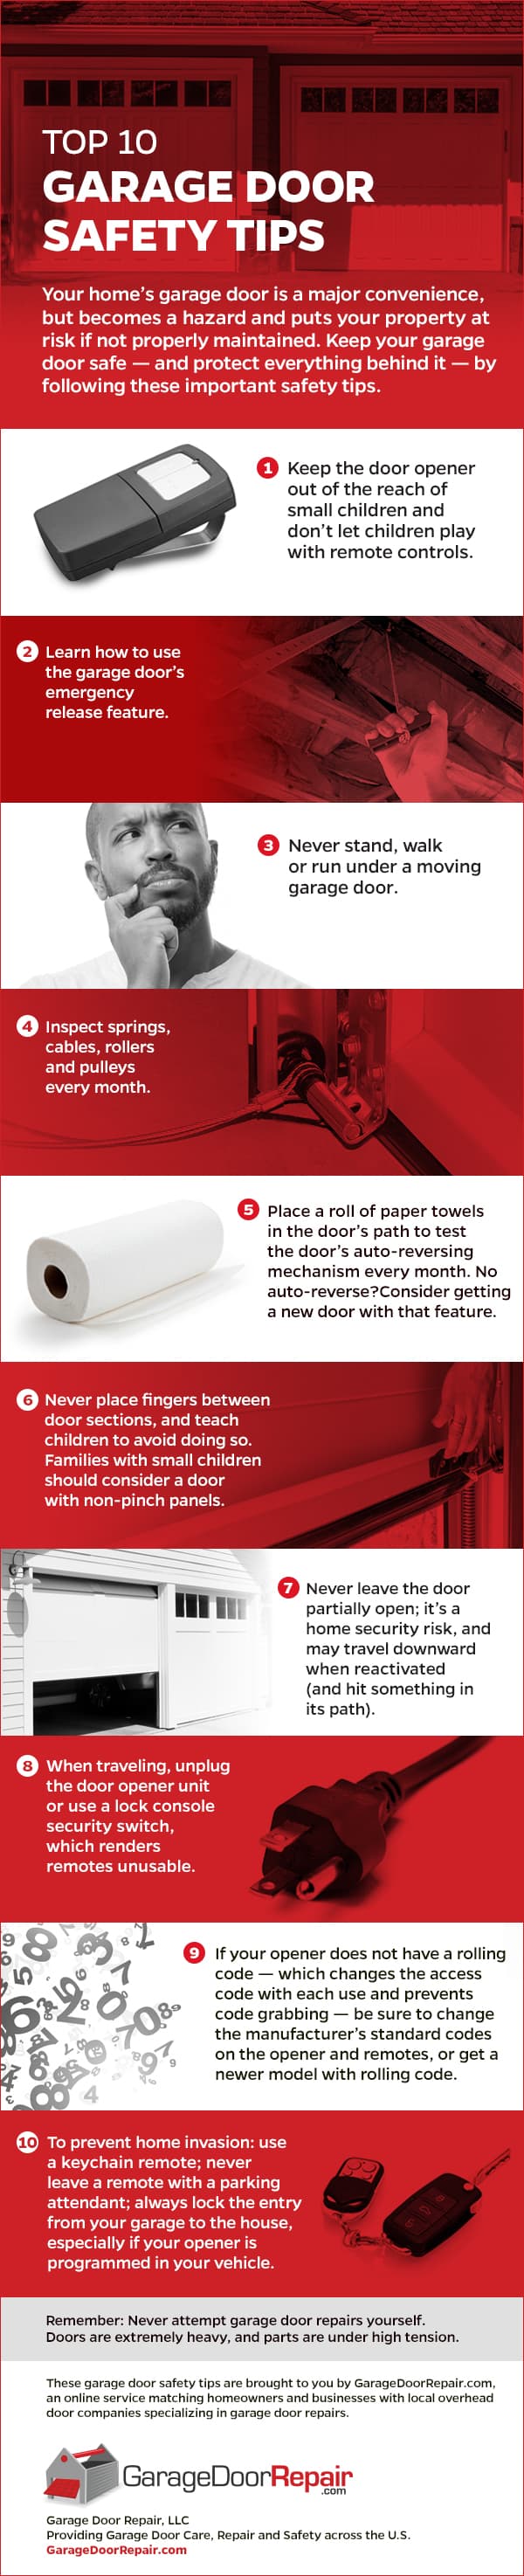
A home with a garage is a wonderful thing — wonderful, that is, when you know how to use/protect it. As great as it is to have extra storage and a place to park, those benefits become liabilities when you don’t practice proper garage safety. Keep your garage in proper working order so that it, its contents and your household members stay safe. Follow these tips for maximizing garage door safety:
Our Top 10 Garage Door Safety Tips
- Keep the Opener Out of the Reach of Children. One of the most important garage safety tips is to keep your door opener out of the wrong hands. Don’t let kids — especially small children — play with the openers, and don’t keep remotes where they can access them.
- Prepare for Emergencies. Should you need to open the door in case of an emergency/accident, you’ll want to know where the emergency release feature is located. Find out and be prepared.
- Be Cautious. Never step, walk, run or otherwise move under a closing or opening garage door. Teach your kids to never do so.
- Inspect Gears. Each month, take the time to inspect springs, cables, rollers and pulleys to know they’re still working properly.
- Test Auto-Reverse. If your garage door has an auto-reverse feature, put a roll of paper towels in the door’s path on occasion to make sure it’s working. If you don’t have this feature, look into getting a door/opener that does — it can prevent serious accidents.
- Watch Your Fingers! Don’t put fingers in between door sections, and teach your kids to avoid doing so. If you have small children, look for a door with non-pinch panels to help avoid injuries.
- Don’t Leave Door Ajar. Never leave your garage door partially open, whether or not you’re nearby. It’s both a security and a safety risk, as someone could enter the garage (and possibly your house) and/or someone could get caught underneath if the door is reactivated.
- Unplug When You’re Away. When you’re going to be out of town, unplug the door opener unit — or lock it so that it’s unusable.
- Change the Code Often. Get a rolling code that changes the garage access code with each use. Or, at the very least, regularly change the standard codes on the opener and remotes.
- Prevent Invasion. Always lock the door to your house when you leave, even if the garage door is closed. Should someone get your remote, it could mean access to both your garage and home if the service door is unlocked. Likewise, keep tabs on your remotes — don’t leave it with a parking attendant, for example, and consider putting it on a key ring so it stays with you at all times.
To protect your home and loved ones, follow the garage door tips above. At Garage Door Repair, we’re happy to help you repair or update your garage to make sure it’s safe and in good working condition.
If you’re like most homeowners, you probably give little thought to your garage door — until it breaks. Suddenly, you’re forced to make all kinds of decisions about materials, installers and even the types of springs required to safely raise and lower your garage door.
Your garage door springs are more important than you probably realize. Property damage, personal injury and even death are just a handful of the dire consequences awaiting homeowners who gloss over garage door spring selection and safe installation. Yes, actual deaths have been a result of poorly installed springs, which is one of many reasons replacing a broken garage door spring should not be a DIY project. Always contact your local garage door experts when you are dealing with a broken garage door spring.
This article covers the most common spring types:
Different Types of Garage Door Springs
Although there is a broad range of different spring types (and sub-types), the two most popular categories are extension and torsion springs.
1. Extension Springs
Usually located above the upper horizontal tracks on both sides of the door, extension springs are the most common residential garage door spring type. In order to open the door, these springs extend — providing counterbalancing force to support the door. The more force that is applied (via hand or motor), the more the extension spring expands. All extension springs should be paired with safety cables. Safety cables prevent the extension spring from becoming a projectile in the event of a spring, cable or bottom bracket failure. These events can occur at any time while the door is open, closed or in motion. Safety cables should be installed on all extension spring doors.
2. Torsion Springs
Whereas extension springs “extend” or “stretch,” torsion springs use torque to raise garage doors. Attached above the garage opening, torsion springs slowly twist and coil on the shaft whenever force is applied (via hand or motor).
Torsion springs come in a wider variety of options, including various wire sizes and lengths. These variations are calculated specifically dependent upon your garage door weight, height, track radius and more.
Which Garage Door Springs Are Best?
Because extension springs are usually much cheaper, they are often the garage door spring solution in most residential construction projects. It is important to note, however, with more exposed parts, they’re also more dangerous.
By contrast, torsion springs are able to support more weight and last twice longer. They offer greater overall balance, making it easier to open and close your garage door. And with fewer exposed parts, they’re also safer to use. As a result, torsion springs tend to be more expensive.
If you’re in the market for new garage door springs, be sure to factor in the added benefits of a torsion spring system. When it comes to home improvement projects, garage door replacements provide some of the highest returns. You can further boost the ROI of your investment by choosing longer-lasting torsion springs over extensions springs.
Remember that whether through stretching or torque, both types of springs operate using extreme tension. To limit exposure to damage or injury, it is strongly recommended that you consult with a professional garage door installer before attempting any repairs on your own. To find reputable consultants in your area, use the free search tool located in the footer below.